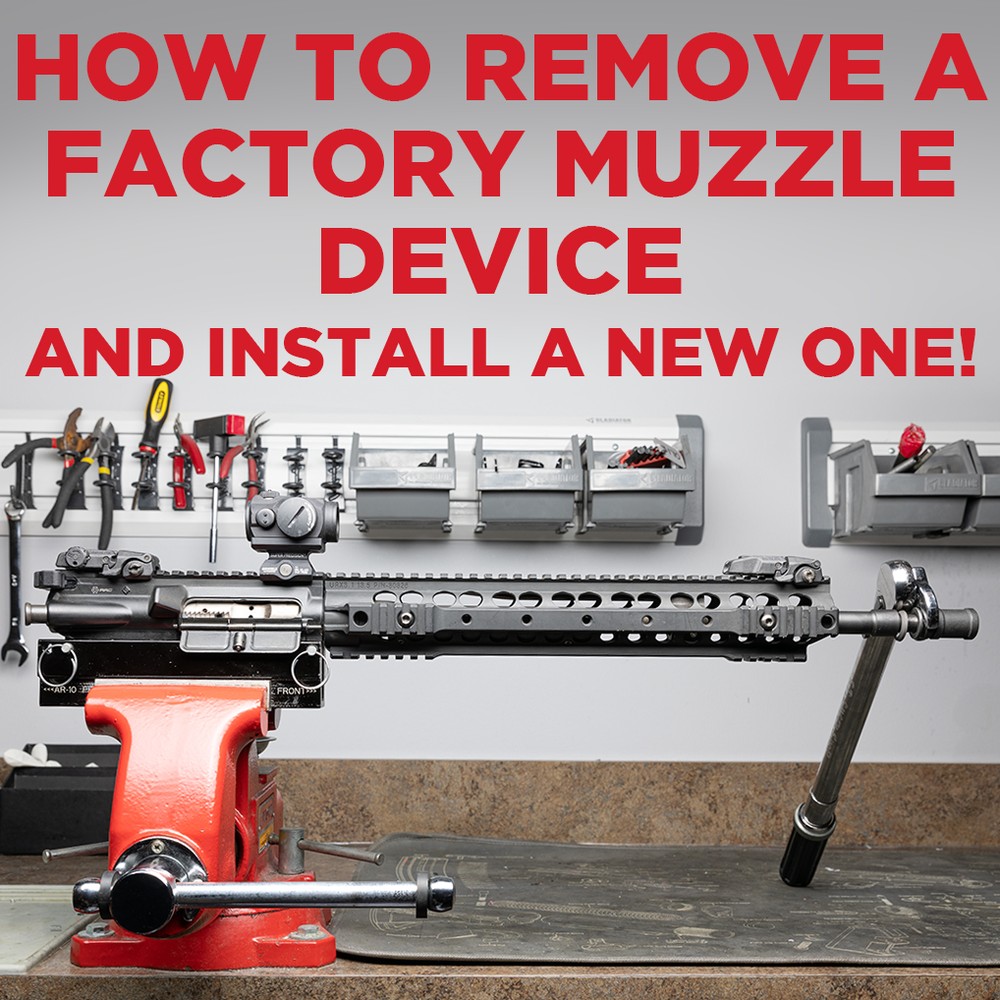
How to Remove an A2 Muzzle Device & How to Install a New Muzzle Device
With a bonus tip on how to time them!
As most of you know already, we like to indulge in all things NFA. But when it comes to getting a new silencer for your firearm, there’s potentially one more step standing in the way of fulfilling all your suppressed shooting needs, and that’s how to remove your original muzzle device, and how to install a new one.
Now, you may have caught the caveat above when we say potentially. Some silencers accept your original muzzle device; that information is usually on the manufacturer’s website if you’re questioning whether or not the one you have, or the one you’re interested in, does.

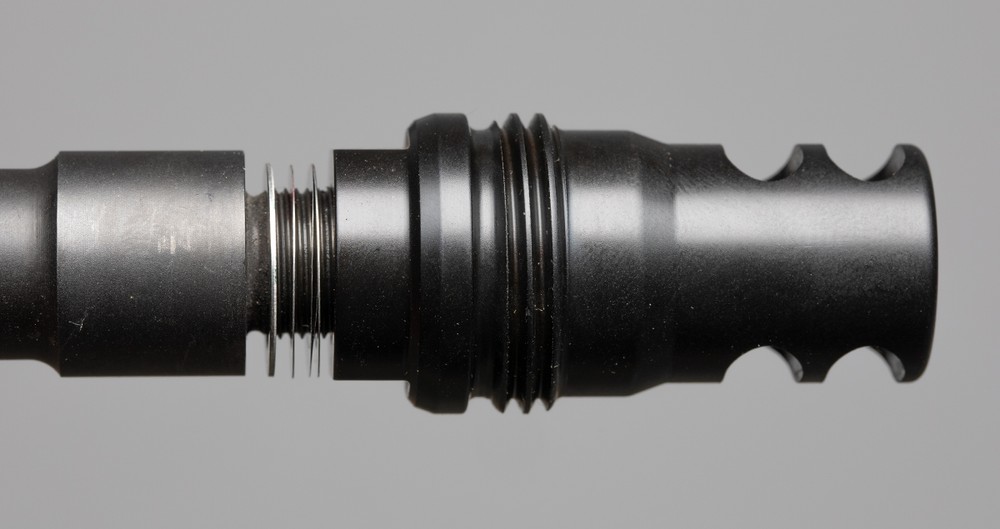
Removing your A2 muzzle device
We’re not trying to over-complicate a simple issue here. Some people may be thinking that you just unscrew it and wham-bam it’s done. Others may be thinking it’s got to be complicated because there’s a full blog post dedicated to it. Well, we’re here to let you know it’s a lot simpler than you may think. It all depends on how it was put on to the host firearm to begin with though, so we’ll touch on each option below.
First and foremost, it is very important that you secure the barrel before trying to alter or adjust anything. We recommend using a barrel clamp or reaction rod to prevent any bending, shearing, or breaking. Though you can (and we have) get away with simply clamping your receiver in a vice. It all depends on how secure the barrel is on the device. Just note that if you are not secured in a barrel block or to a reaction rod, you are going to be exerting force on your barrel index pin which is not infallible. This is why we recommend torqueing against the barrel itself.
Next, you need to determine how the device was secured, so we’d suggest you go in this order based on what we’ve experienced:
Pin-and-Weld
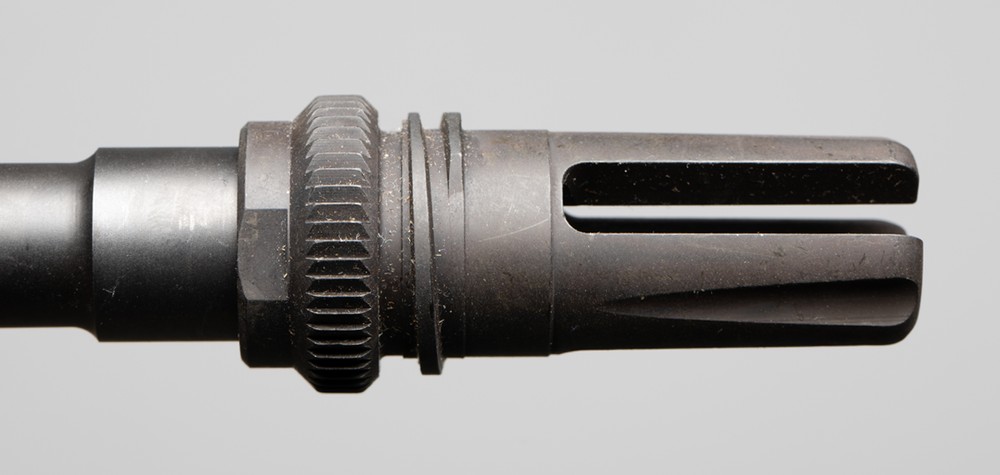
The first thing you’ll want to look for is markings on the muzzle device itself for a pin-and-weld. This is commonly used for barrels where, if the muzzle device is removed, they are shorter than 16 inches, making it require paperwork for being considered a short barrel rifle, or SBR. In this particular case, the muzzle device is usually pin and welded on to the barrel to make it a 16-inches or longer.
Silencer Shop Note:The removal of a pin-and-welded device on an existing rifle with a barrel shorter than 16 inches constitutes constructing a Short Barrel Rifle. You need to already have an approved Form 1 before attempting this procedure yourself. |
The easiest way to spot a pin-and-weld job is to observe the circumference of the rear part of the muzzle device toward the shooter. In almost every case, there will be a noticeable 3-5mm hole that’s filled with a metal pin and welded over. In many cases, that weld is finished, and will be smooth, but still noticeable.
Whether you decide to go to a gunsmith, or you want a DIY job, to remove a pin and weld, cutting and sparks will be involved (for safety purposes, we must note that if this is something you’re wanting to attack on your own, protective gear is always advised). We’d recommend an angle grinder with a cut off wheel. You’ll want to apply the angle grinder to the top of the weld and to cut through the weld to expose the pin. Remember, you just need to cut through the surface weld, NOT the threading on the barrel.
Tightly Screwed On
Once you determine that there are no pin-and-weld markings, might want to try is to use a wrench to see if it will unscrew on its own. If it seems too difficult to remove, and won’t budge with a wrench, Loctite or Rocksett may have been used.
Loctite
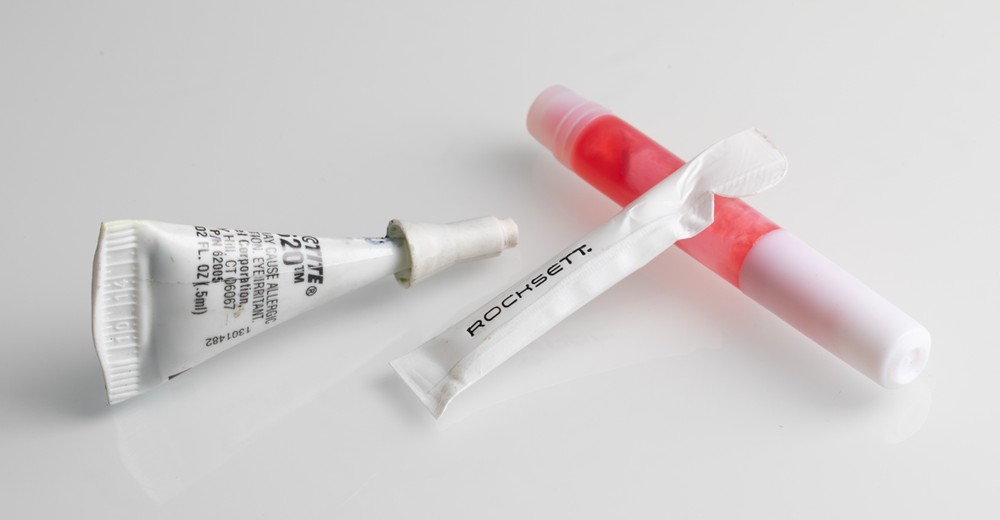
The most common way a muzzle device is secured to a firearm is by Loctite, a compound that breaks down under heat. If you’ve got one, a blow torch can be used to heat up the threads and loosen the Loctite. Obviously the amount of heat you apply and time it will take will depend on your heat source, but the idea here is to get the threads hot but not red hot. Side note: Most heat guns (not blow dryers but proper heat guns) will heat metal up to the 400-500 degrees needed to defeat red thread locker but forced air is not nearly as efficient as direct flame in this application. If a heat gun is all you have, it will work, you’re just going to be standing there for a while.
Rocksett
A less likely, but still potential securement of a muzzle device is using Rocksett. Rocksett is an interesting material and there is a considerable amount of misinformation out there on this substance. We’ll start by saying that – in most instances – Rocksett can be defeated by simply applying torque. It is a ceramic cement that is intended to secure threads from vibrating loose under temperatures up to 2000 degrees. By definition, this ceramic is a water-soluble compound, meaning it breaks down when wet. If you are experiencing any trouble torqueing off a device that was secured with Rocksett, you’ll need to soak the muzzle side of the barrel in warm water for a few hours at least. Before doing so, it’s highly recommended that you spray WD-40 down the barrel to prevent any rusting or damage to it.
Side note: There will be someone who tells you that they got their Rocksett off by applying heat. This person is not wrong. They did apply heat and the device did come loose. But the device would have come off without heat anyway. See above regarding heat rating of Rocksett.
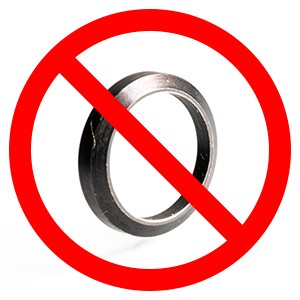 |
Out with the old, in with the newWhatever you decide to do with your removed A2 muzzle device, take the crush washer that was put on the firearm and put it wherever that original device is going. We repeat – DO NOT re-use the original crush washer. You’ll need to use the new shims that most likely came with your new muzzle device. |
How to Install a new Muzzle Device
At this point, you’re in the home stretch. If you’ve perused our site, you may have already seen that there are more than a few muzzle device options out there, so installing one depends on what type you purchased, or what might have come with your silencer. Most manufacturers will provide you with a torque specification that they recommend for installing their devices. In most cases it is somewhere between 25 and 35 foot pounds. If your device did not have a recommendation, 30ft lb has always done well for us and not caused us any issues with the crown or shoulder.To install a flash hider or omnidirectional muzzle device
 |
If the muzzle device is a flash hider (like an AAC 51T], for example), or omnidirectional (like this Q Cherry Bomb), simply screw it on with the appropriately-sized wrench (a torque wrench is preferred so you know how many foot-pounds you’re tightening it) or ratchet depending on the mount.
To install a muzzle device that needs to be timed
 |
If you’re installing a muzzle brake (like a Rugged brake [https://www.silencershop.com/rugged-muzzle-brakes.html]), or your new device has an indexing notch and you want to time it (like this Dead Air device [https://www.silencershop.com/dead-air-flash-hider.html]), you’ll need to time it using shims. Shims most likely came with the device when you bought it.
Smart hack for timing a muzzle deviceThe easiest way to time your device is to screw it all the way onto the barrel until it bottoms out. You do not need to tighten it, just get to the point where you can’t rotate it anymore with your hands. Then, un-thread the muzzle device until it is in proper alignment. Use your shims by sliding them into the gap created between the shoulder of the barrel and the muzzle device. Stack and adjust your shims until you are able to fill the gap created with your shim combination. Back the muzzle device off all the way and place the shim(s) over the threads on the barrel. Then reinstall your muzzle device. Typically, when you tighten your new device by hand, it should fall between 15 to 25 degrees short of aligned. A torque wrench should put you into proper alignment, but there will be some guess work involved to fully align it. At the end of the day, if it’s 34 foot-pounds (the measure of rotational torque) to get it properly aligned, it’s okay as long as it is properly aligned. |