How to Clean a Suppressor
Maintaining your gear is an important part of keeping your firearm ready to rock, just like you would clean your rifle and handgun after a long day of training on the range you also need to clean and maintain your suppressors to keep them running optimally. There are many ways to go about cleaning a suppressor, we will cover the most common and effective ways to keep your suppressor performing at its peak and discuss the particulars of each method.
Table of Content
Suppressor Materials
|
Materials and Cleaning Methods Chart |
|||
|
Aluminum |
Stainless Steel |
Titanium |
|
|
Yes ✅ |
Yes ✅ |
Yes ✅ |
|
|
No ❌ |
Yes ✅ |
Yes ✅ |
|
|
Yes ✅ |
Yes ✅ |
Yes ✅ |
|
|
No ❌ |
Yes ✅ |
Yes ✅ |
|
|
No ❌ |
Yes ✅ |
Yes ✅ |
|
|
No ❌ |
Yes ✅ |
Yes ✅ |
|
* “The Dip” is highly toxic and can cause bodily harm if performed or disposed of incorrectly, Silencer Shop does not recommend this method.
- Aluminum: Aluminum is incredibly lightweight and can be very durable in certain applications, but aluminum does not have the same strength of steel and can be susceptible to damage if improperly maintained. Using harsh suppressor cleaner solvents, ultrasonic cleaners, or abrasive tumblers can cause erosion and pitting which is detrimental to the aluminum baffles.
- Stainless steel: Suppressors constructed of stainless steel are more durable when shooting and when cleaning. Stainless steel suppressors can withstand just about any cleaning method, but we recommend being mindful of the solvents you are using, the coating on your silencer may not be so resilient.
- Titanium: Titanium suppressors are known for their lightweight yet durable features, so it can be treated similarly to stainless steel in regard to cleaning methods. Titanium can react with certain solvents, particularly acidic cleaners, so we recommend using more basic solvent like Simple Green.
How Often Do You Have to Clean a Suppressor
Always consult your owners manual or refer to your manufacturer for cleaning and maintenance schedules, they will have the best information for your specific silencer. Usually, centerfire rifle suppressors and pistol silencers will require much less cleaning than a rimfire silencer. (As an FYI, if you aren’t an ammo expert, rimfire ammunition is typically .22 LR.) Rifle silencers can go tens of thousands of rounds before requiring any cleaning, many do not need to be cleaned at all. Pistol cans follow a similar trend to rifle cans, requiring little maintenance to perform optimally. Rimfire suppressors, specifically .22lr suppressors, require cleaning every few hundred rounds due to the types of projectiles and propellants that are common for the cartridge.
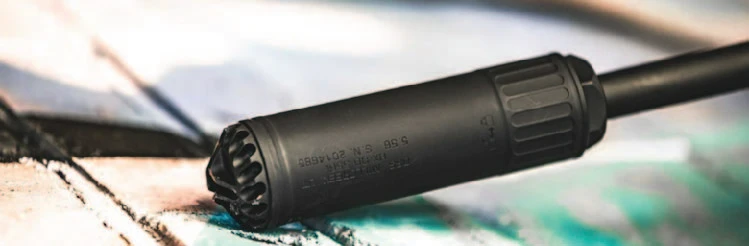
Credit: @huxwrx
How to Clean a Sealed Suppressor
Sealed suppressors or tubeless/welded suppressors are not disassemblable the way many rimfire cans are. Because of how rifle and pistol ammunition works these suppressors require less cleaning but still benefit from occasional tune-ups. The best way to clean suppressors that are sealed is to use a suppressor cleaning solvent. These solvent are specially formulated to remove carbon, copper, and lead from sealed silencers and are safe for silencer parts and finishes.
Suppressor Cleaning Solvents
Suppressor cleaning solvents like CAT206 or HUXWRX Suppressor Sauce are specially formulated solutions designed to simplify the often tricky task of cleaning firearm suppressors. Over time, suppressors accumulate carbon, lead, and other residue that can affect performance, increase weight, and impact sound suppression. Using a solvent like CAT206 or HUXWRX Suppressor Sauce helps break down these stubborn residues, allow you to simply rinse away any fouling and restore your silencer to like-new condition.
These solvents work by utilizing specific chemicals that target carbon deposits and other contaminants, allowing for a thorough cleaning that doesn’t damage the suppressor’s materials. Regular use of a cleaning solvent can extend a suppressor’s lifespan and ensure consistent performance.
How to Clean a User-Serviceable Suppressor
User-Serviceable suppressors are easily taken apart into their base components, meaning you have access to all of the parts that may need some sprucing up. All rimfire suppressors and some centerfire suppressors will be user-serviceable, and can be cleaned with an assortment of procedures, just be mindful of the construction materials used in your silencer.
- Monocore / baffles: Depending on your suppressor’s design, the innards of your silencer are either a monocore or baffle setup. These internal structures will contain the bulk of the carbon and lead trapped in your suppressor, and will need to be cleaned to continue to work properly. If you’re wondering how to clean suppressor baffles, baffles and monocores are usually easy to clean, using a brush and solvent will work just fine on these parts, a plastic pick or non-marring scraping tools can be useful for getting into the corners and other nooks and crannies. Make sure any areas where the baffles meet are spotless to ensure proper alignment when reassembled.
- Tube / end caps: These are the easiest parts to clean and get the least of the dirt and grime compared to the other components. Because the tube is shielded by the baffles or monocore it will just need to be wiped down or gently scrubbed to move any surface carbon. The endcaps do not need any special treatment, wipe them clean with a rag and you are good to go.
- Threads: A few passes with a brush and a light solvent and your suppressors threads will be spick-and-span, just make sure there is no debris on the threads.
- Boosters: Boosters and pistons are the only moving parts in a silencer, and as such will require some maintenance to function. Remove the piston and booster spring from the boost housing, wipe them clean and apply a light coat of lubricant. It is very important the interface between the piston and housing is free of any debris to allow the piston to seat correctly. Once the housing is cleaned, lubricate it and reassemble the booster.
O-rings: These little guys are almost always located between the booster housing and the piston. A gentle wipe down and lube allow O-rings to function properly. Ultrasonic cleaners and other solvents will degrade the O-ring material, so remove these if you opt to use solvents or ultrasonic cleaners.
Suppressor Cleaning Methods
Brush and Solvent - “The Elbow Grease Method”
A very effective way to clean a suppressor is to just use a good old fashioned brush and solvent. The great thing about using this technique is that it’s the most gentle option, and you probably have the tools needed to build a suppressor cleaning kit laying around already. While it may take a little time to clean, you’ll be able to reach the intricate areas effectively, without damaging your suppressor.
In order to use this method, you’ll need:
- A scrubbing brush (non metallic is recommended)
- A pick (toothpick, punch, flat-head)
- A cloth (terry cloth, microfiber, paper towel)
- A noncorrosive solvent (for example, diluted Simple Green, Hoppes #9, or CLP)
Using the materials mentioned, disassemble your suppressor. Next, soak the tube and baffles in your solvent mixture for a few hours (some prefer overnight for maximum effectiveness). The next day, brush / wipe away any leftover residue.
Wet Media Tumbler
Wet tumbling is another option for how to clean a suppressor. Wet tumbling uses a rotating barrel containing a solvent and media (usually stainless steel pins). Wet media tumblers are common to clean brass cases for reloading. This method is not as harmless as the brush method, as it can wear on the tube finish and round thread pitch.
A wet media tumbler uses:
- A rotary wet media tumbler
- A noncorrosive solvent (this is usually water and a small amount of dish detergent powder, dawn, or similar)
- About 5 pounds of metal media (little pieces of stainless steel)
Simply fill the tumbler to its fill line, toss in your suppressor components, solvent of choice, and solvent of choice tumbling media (optional), and let the tumbler run for a few hours. The dirtier your suppressor is the longer it will need to be tumbled for. Once the cycle is over remove your parts, rinse them with hot water, and wipe them down with a clean cloth. Make sure that none of the steel media pins are hiding in the threads or corners of the baffles.
Soda Blaster
Soda blasters are a heavy-duty cleaning option which uses sodium bicarbonate and compressed air to literally blast away the lead and carbon fouling. This method will require a number of specialized pieces of equipment but can be very effective and quick for getting a silencer as clean as the day you got your approval.
In order to use the soda blaster, you will need:
- Compressor
- Soda blaster
- Sodium bicarbonate
- Blast box
- Recycling method (shop vac, or similar)
After your suppressor is disassembled insert all of the pieces into the blast cabinet and seal it up. Use the soda blaster to remove all of the lead and carbon build up. We do not recommend using anodized or cerakoted parts in the blast cabinet as it can erode the finish. Use a shop vac to flush airborne particulates in the interior of the blast box before opening it up.
Ultrasonic Cleaner
Ultrasonic cleaners use a high frequency vibration to agitate the dirt and grime off of your silencers components. These types of cleaners are popular because they do not require oversight, just put the parts in the cleaner and come back a couple of hours later. Ultrasonic cleaners are not recommended for aluminum parts or coated parts like suppressor tubes.
In order to clean with an ultrasonic cleaner, you’ll need:
- Ultrasonic cleaner (with basket)
- Non Corrosive solvent (simple green or similar)
Cleaning suppressor with ultrasonic cleaners is easy, just remove the basket from the ultrasonic cleaner and place your suppressor parts onto the basket. Pour your solvent into the ultrasonic cleaner, then add the basket with the suppressor parts to the ultrasonic cleaner. Let it run for a few hours. Once done, your suppressor parts will have a filmy residue that you’ll want to towel off.
Dry Media Tumbler
Another method to clean your suppressor is a dry media tumbler. These style tumblers use a vibrating bowl filled with a coarse media, usually walnut or corncob, which is a mild abrasive effectively scrubbing the parts clean.
Dry media tumblers use the following:
- A rotary dry tumbler
- A dry media (walnut or similar)
Using the materials above, you’ll place the dry media and then the suppressor parts into your dry tumbler. Secure the tumbler, turn it on and let it run for a few hours. In our testing, we found this cleaning method to be less effective than other solutions.
The Dip
This method can cause bodily harm, property damage, and even death.
cleaning a suppressor using the dip method-caution-highly hazardous
The Dip is the most controversial suppressor cleaning method in this bunch. While it does work, the costs associated are too great to justify the reward. If you do decide to go down this route, which we do not support in any way, shape, or form, contact your local fire department for guidance on proper disposal before you begin. The dip is also extremely detrimental to the environment so DO NOT dispose of it on your own without proper guidance from authorities. We cannot emphasize this enough.
The dip method uses:
- Vinegar
- Hydrogen peroxide
- Vat (mason jar, or similar)
Because of its danger and toxicity, we won’t be providing directions for how to use the dip as we don’t believe there is a way to safely do this at home when there are better, easier, and less dangerous solutions.